
News Archive
| Search |
Public Sources
All my github repos
Git repositories
logproc
ausadmin-web
get-cert
fat-set-uuid
djbdns
LS30
TRS-80
xbee-controller
alpine-mojo-base
docker-eagle
zmac
smallc
dc20
perl-sql-tools
avr-onewire
avr-fd-serial
get-cert
Electronics
Arduino RFID Door Lock
XBee network controller
Hardware
LS30 Burglar Alarm
Online store
Software
logrun
math-trainer
mp3cd-tools
fakepop
aunic-modify
ausadmin
sms-notify
apt-cacher
video-capture
wav-fixer
misc
TRS-80 software I wrote
System-80 Gallery
Zeta BBS
Utilities
Printer Utils
Patches
Operating Systems
Library of C
Languages
Include files
Hardware
Games
FORTRAN Programs
File Utils
Disk Utils
Comms Programs
CMD File Utils
BASIC Programs
Uni Assignments
Hats I wear
aus.* newsgroups
www.news-admin.org
Philosophy
New Technology
Ethical Internet Advertising
Digital Freedom
Anti-spam
Age of plenty
Ditch Windows
Technical
Big Server
Spam
Unclassified
Zeta Internet
Links
Your donation gives me time
to develop more cool free stuff
Stop the Australian (Anti)Vaccination Network


Nick Andrew News
2024-06-30 - I have a new GPG key
My old key, generated in the year 2000, is not up to today's security standards. So I've created a new key, and here are the details. You can verify the following text, because it is signed with both the old and new key.
-----BEGIN PGP SIGNED MESSAGE-----
Hash: SHA256

This is a public notice that I am migrating to a new GPG key to upgrade
the digest algoritm away from the weak 1024 bit DSA. My old key is:


pub   dsa1024 2000-11-02 [SCA] [expires: 2024-09-14]
      B3ED68948E491770C24A67E362666EB9418487E7
uid           [ unknown] Nick Andrew
uid           [ unknown] Nick Andrew (alternate address)
uid           [ unknown] Nick Andrew (Other email address)
uid           [ unknown] Nick Andrew
sub   elg1024 2000-11-02 [E] [expires: 2024-09-14]

My new key is:


pub   rsa4096 2024-06-30 [SC] [expires: 2026-06-30]
      C0442344606FC638C4DC75FCF4F6F42E56792B22
uid           [ultimate] Nick Andrew
uid           [ultimate] Nick Andrew (Only for key identification)
uid           [ultimate] Nick Andrew
sub   rsa4096 2024-06-30 [E] [expires: 2026-06-30]

It's got a new email address to allow unique specification by email address.

My new key is on the keyservers as 56792B22. I will allow the old key
to expire naturally.

This message is signed with both keys:

    gpg --clear-sign -u 418487e7 -u key-2024@tull.net new-key.txt

To verify:

    gpg --verify new-key.txt.asc

Nick Andrew
2024-06-30
-----BEGIN PGP SIGNATURE-----

iF0EAREIAB0WIQSz7WiUjkkXcMJKZ+NiZm65QYSH5wUCZoFRewAKCRBiZm65QYSH
51yTAJ9tcRpc6FO3jRYyRZwsPuNCYumdVQCeIeIk+y7j7IXeAeAcArOhxzEw+VeJ
AkYEAQEIADAWIQTARCNEYG/GOMTcdfz09vQuVnkrIgUCZoFRhRIca2V5LTIwMjRA
dHVsbC5uZXQACgkQ9Pb0LlZ5KyIjLQ/+Pfszo6DXIyOVk1VDJ77KqnRdKPx+w7L+
m9B1SXdvVReMOEW1zWsVnHIH0RRyzUnhs8d6GqlTEgpS/qj1WqFnArxlSWbYObaY
5qYNqXOLeobqLU79IH3Uv20sjnpeMhfzqtuqeexta3LSFUlS3yZTHbYEf+HbuMU2
jVl3KUsQZZH7dpp/IDMhGUrhT9kkFoKvYMpCIu4p++Ai7Ojbt8i80zOSTyIRDx2O
HgzmNQctX3iwCwYQlnWXtq2YQKFFHqzPRaEASsox0QELwfHsOSmKqMJAGXYXKt9Q
Nh/65f8D6CeHnv4DPJ6CVqxHJPp03zM5OsZsdjPjRP2lBSwtu/0+qV9TjMHj6ghN
mk+CcYXbj5OevJvja/0hYLQ7NqKAZhJwQDb4GInBOeQY7P7Bj89/NFJkNMZ7Ad8K
C2CWViZNC8XnZP/ipG+HKAWrSXZJ8nG/wHdiSlCCS3xd5IU13KkcEJvEEhPad5+E
7yFaxn1zogR1khIUqWmmIBOtmyTDLVbp/oxXVhNiBO8E74tIyw9ACOHeNV/xR+Ue
57zIyCg3VGRwYVBmY9Lr/MIA3KqO4TYcKVjIm1Tjp9RmNbtGl24337IezMeDfD/Y
TyzFSS/eNekmzmSBANxAuGyCh3XbYvD+uaSclo2rNJFTPfqsmbN9OD8d7/pIYD7P
mO6bCMXXfHc=
=pOT1
-----END PGP SIGNATURE-----
2016-05-10 - Installing a StartSSL identity certificate in Google Chrome
StartSSL provides free SSL/TLS certificates for web servers, and it also installs a Class 1 Client certificate into your browser to authenticate yourself to its own site.
This article is all about how to install the Class 1 Client certificate into Google Chrome, especially when Chrome does not accept the certificate automatically, as happened to me when an old certificate expired.
I'll be signing up under the dummy address website@nick-andrew.net to demonstrate the process.
Step 1, Sign Up
- Visit https://startssl.com/
- Enter your email address, website@nick-andrew.net
- Click on "Send Verification Code"

- Wait for the email from validation@startssl.com
- Enter the supplied code into "Verification Code", then click "Sign Up"
At this point, Chrome is supposed to import your client certificate and you can be on your way. Certainly at this point if I was using Firefox, then Firefox has installed the certificate, and a box appears with a "Login Now" button. But it doesn't happen for me, on Chrome version 50.
So I'm going to set it up the hard way.
Step 2, Generate a private key
At a shell prompt, do this:
$ openssl req -newkey rsa:2048 -keyout website.key -out website.csr
Generating a 2048 bit RSA private key
..............+++
...............................................................+++
writing new private key to 'website.key'
Enter PEM pass phrase:
Verifying - Enter PEM pass phrase:
-----
You are about to be asked to enter information that will be incorporated
into your certificate request.
What you are about to enter is what is called a Distinguished Name or a DN.
There are quite a few fields but you can leave some blank
For some fields there will be a default value,
If you enter '.', the field will be left blank.
-----
Country Name (2 letter code) [AU]:
State or Province Name (full name) [Some-State]:
Locality Name (eg, city) []:
Organization Name (eg, company) [Internet Widgits Pty Ltd]:
Organizational Unit Name (eg, section) []:
Common Name (e.g. server FQDN or YOUR name) []:website@nick-andrew.net
Email Address []:

Please enter the following 'extra' attributes
to be sent with your certificate request
A challenge password []:
An optional company name []:
$ cat website.csr | xclip -in
Make sure you enter website@nick-andrew.net in the Common Name field.
- Click on "Certificates Wizard"
- Select "Client S/MIME and Authentication Certificate"
- Enter email address website@nick-andrew.net
- Select "Generated by Myself (.cer PEM format certificate)
- Middle-click the mouse button to paste in the .csr file contents
- Click "here" to download the certificate
$ unzip website%40nick-andrew.net.zip
Archive:  website%40nick-andrew.net.zip
  inflating: 1_Intermediate.crt
  inflating: 2_website@nick-andrew.net.crt
To import a certificate, Chrome needs a file in PKCS12 format. The magic command to make that is:
$ openssl pkcs12 -export -inkey website.key -in 2_website@nick-andrew.net.crt -out certificate.pkcs12 -name "StartSSL cert for website@nick-andrew.net" -certfile 1_Intermediate.crt
Enter pass phrase for website.key:
Enter Export Password:
Verifying - Enter Export Password:
Finally, you can import the certificate.pkcs12 file into Google Chrome. Go to chrome://settings and click on "Show advanced settings". Then click on "Manage certificates..."
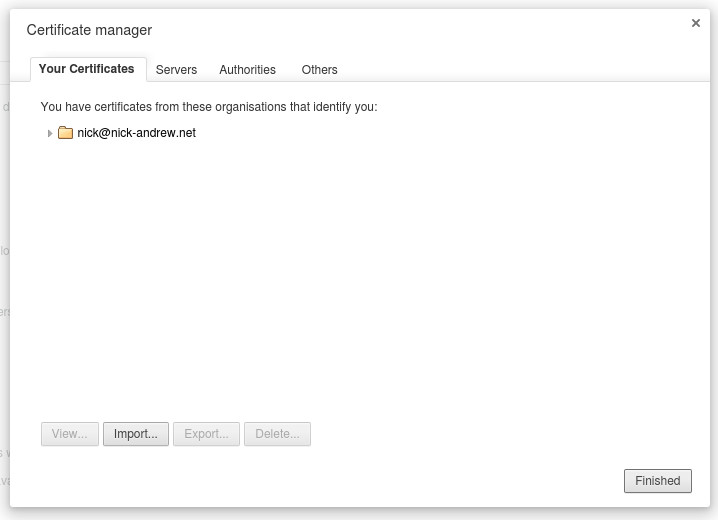
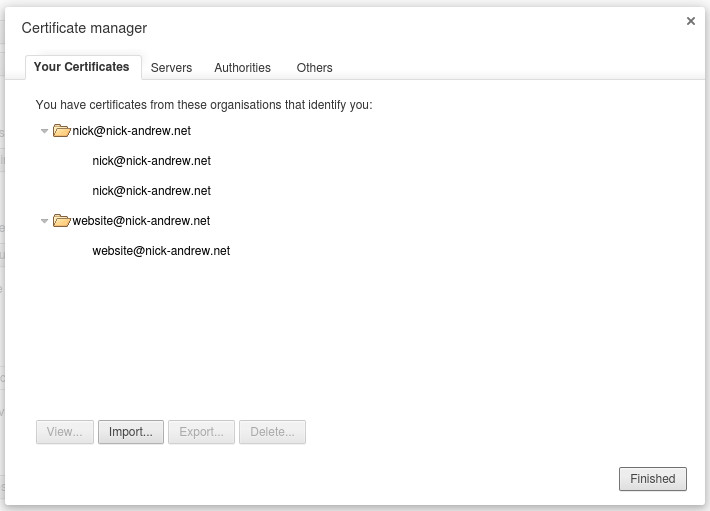
In the "Your Certificates" tab, select "Import..."
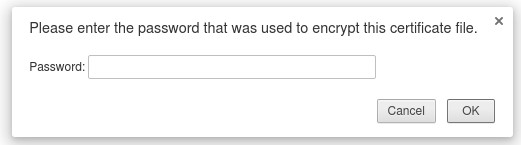
Select "certificate.pkcs12" and enter the Export password you used.
At this point, Google Chrome has successfully imported the certificate, and it can be used to authenticate to StartSSL the next time you visit the site.
2014-10-06 - Testing tsuru PaaS system
Installing my app:
vagrant@tsuru:~/GIT/tsuru-demo$ git commit -m 'Add basic app'
[master 57ffb34] Add basic app
 3 files changed, 29 insertions(+)
 create mode 100644 .buildpacks
 create mode 100644 Procfile
 create mode 100755 app.psgi
vagrant@tsuru:~/GIT/tsuru-demo$ git remote -v
vagrant@tsuru:~/GIT/tsuru-demo$ git remote add tsuru git@192.168.50.4.nip.io:helloworld.git
vagrant@tsuru:~/GIT/tsuru-demo$ git push tsuru master
Counting objects: 8, done.
Compressing objects: 100% (6/6), done.
Writing objects: 100% (8/8), 1.00 KiB | 0 bytes/s, done.
Total 8 (delta 0), reused 0 (delta 0)
remote: tar: Removing leading `/' from member names
remote: BUILDPACK:
remote:        Multipack app detected
remote: =====> Downloading Buildpack: https://github.com/miyagawa/heroku-buildpack-perl.git
remote: =====> Detected Framework: Perl/PSGI
remote: -----> Bootstrapping cpanm
remote:        Successfully installed App-cpanminus-1.7012
remote:        1 distribution installed
remote: -----> Installing dependencies
remote:        ! Configuring . failed. See /home/ubuntu/.cpanm/work/1412583687.168/build.log for details.
remote: -----> Installing Starman
remote:        Successfully installed ExtUtils-Config-0.008
remote:        Successfully installed ExtUtils-InstallPaths-0.010
remote:        Successfully installed ExtUtils-Helpers-0.022
remote:        Successfully installed Test-Harness-3.33
remote:        Successfully installed Module-Build-Tiny-0.038
remote:        Successfully installed HTTP-Date-6.02
remote:        Successfully installed File-ShareDir-Install-0.09
remote:        Successfully installed Test-SharedFork-0.29
remote:        Successfully installed Test-TCP-2.06
remote:        Successfully installed URI-1.64
remote:        Successfully installed LWP-MediaTypes-6.02
remote:        Successfully installed Encode-Locale-1.03
remote:        Successfully installed IO-HTML-1.001
remote:        Successfully installed HTTP-Message-6.06
remote:        Successfully installed HTTP-Body-1.19
remote:        Successfully installed Try-Tiny-0.22
remote:        Successfully installed POSIX-strftime-Compiler-0.40
remote:        Successfully installed Apache-LogFormat-Compiler-0.32
remote:        Successfully installed Filesys-Notify-Simple-0.12
remote:        Successfully installed Class-Inspector-1.28
remote:        Successfully installed File-ShareDir-1.102
remote:        Successfully installed HTTP-Tiny-0.050 (upgraded from 0.025)
remote:        Successfully installed Hash-MultiValue-0.15
remote:        Successfully installed Devel-StackTrace-1.34
remote:        Successfully installed Devel-StackTrace-AsHTML-0.14
remote:        Successfully installed Stream-Buffered-0.03
remote:        Successfully installed Plack-1.0032
remote:        Successfully installed Net-Server-2.008
remote:        Successfully installed Data-Dump-1.22
remote:        Successfully installed HTTP-Parser-XS-0.16
remote:        Successfully installed Starman-0.4010
remote:        31 distributions installed
remote: Using release configuration from last framework (Perl/PSGI).
remote: -----> Discovering process types
remote:        Procfile declares types -> web
remote:        Default process types for Multipack -> web
remote:
remote: ---- Building application image ----
remote:  ---> Sending image to repository (22.28MB)
remote:  ---> Cleaning up
remote:
remote: ---- Starting 1 new unit ----
remote:  ---> Started unit 63ba717632...
remote:
remote: ---- Adding routes to 1 new units ----
remote:  ---> Added route to unit 63ba717632
remote:
remote: OK
To git@192.168.50.4.nip.io:helloworld.git
 * [new branch]      master -> master
So far, so good!
vagrant@tsuru:~/GIT/tsuru-demo$ tsuru app-list
+-----------------+-------------------------+-------------------------------------+--------+
| Application     | Units State Summary     | Address                             | Ready? |
+-----------------+-------------------------+-------------------------------------+--------+
| helloworld      | 0 of 1 units in-service | helloworld.192.168.50.4.nip.io      | Yes    |
+-----------------+-------------------------+-------------------------------------+--------+
| tsuru-dashboard | 1 of 1 units in-service | tsuru-dashboard.192.168.50.4.nip.io | Yes    |
+-----------------+-------------------------+-------------------------------------+--------+
This looks very nice. At this point, 2 tsuru apps should be ready to run, at the hostnames shown, which both resolve to 192.168.50.4, the address of my cluster.
2014-10-05 - Running perl web apps in Flynn
Flynn is a new PaaS (Platform as a Service) project intended to manage a cluster of servers running applications inside containers. Applications are deployed using a simple 'git push' and behind the scenes the application is built in a container and the container is then started on one or more nodes within the cluster.
Current version is v20140817, classed as Pre-release. In other words, it's still bleeding edge.
I tried it out under a VMWare ESXi client, an LXC container and inside a Vagrant Virtualbox VM (all running Ubuntu 14.04 Trusty).
First, the two failures. Trying it in the LXC container failed utterly because the container wasn't able to itself run containers. I could have probably fixed that by messing with the LXC container configuration, but there are only so many hours in a day (and I use all of them already).
I couldn't get Flynn running under the ESXi client. I doubt it was an unfixable problem, i.e. there's nothing inherent in the ESXi client which would stop Flynn from working.
I did get it going under Vagrant Virtualbox, by following the steps listed under "Manual Ubuntu Deployment" very carefully(*). Those steps were (presented as a script):
#!/bin/bash
#
#  Install Flynn on this host

apt-get update
apt-get -y upgrade
apt-get -y install apt-transport-https curl patch

apt-key adv --keyserver hkp://keyserver.ubuntu.com:80 --recv BC79739C507A9B53BB1B0E7D820A5489998D827B
echo deb https://dl.flynn.io/ubuntu flynn main > /etc/apt/sources.list.d/flynn.list
apt-get update
apt-get -y install linux-image-extra-$(uname -r) flynn-host

if [ ! -f token ] ; then
        curl -k https://discovery.etcd.io/new > token

        patch <<EOF /etc/init/flynn-host.conf
--- a   2014-10-04 08:15:09.380249566 +0000
+++ b   2014-10-04 04:33:20.135872045 +0000
@@ -1,5 +1,7 @@
 description "Flynn layer 0"

+env ETCD_DISCOVERY=$(cat token)
+
 #start on (started libvirt-bin and started networking)
 respawn
 respawn limit 1000 60
EOF

fi

flynn-release download /etc/flynn/version.json
start flynn-host
Don't forget to install the correct linux-image-extra package, as I did - else
you won't have aufs and Flynn will emit unhelpful errors. Don't forget to
run the flynn-release command, as I did - else flynn-host will
not be able to run anything and it will respawn forever by upstart.
In fact it's a good idea to change the respawn limit 1000 60
line to respawn limit 5 300 and add a line
post-stop exec sleep 10
to ensure that if Flynn doesn't start up properly, it won't thrash your VM.
After this it's necessary to run flynn-bootstrap, and that must
be done after setting up some wildcard DNS resources to point to your cluster
host(s). Flynn's load-balancing (?) router uses the hostname in the HTTP
request to distribute your traffic to the apps running in the containers
listening on some ports other than 80 or 443.
When I did eventually get Flynn running, it more or less did what the sparse documentation indicated it should.
I was able to get a simple perl web app running in containers. An app is developed in a git repository and is deployed by pushing a branch to Flynn's git server. Flynn then builds the app into a container and deploys it accordingly. Building the app requires some machine-readable build and execution instructions. Documentation for doing this for perl was nonexistent so I had to figure it out.
Here's my application in its repository.
==> .buildpacks <==
https://github.com/miyagawa/heroku-buildpack-perl.git

==> cpanfile <==
requires 'Mojolicious';
requires 'Sys::Hostname';

==> app.psgi <==
#!/usr/bin/env perl
use Mojolicious::Lite;
use Sys::Hostname qw();

# Documentation browser under "/perldoc"
plugin 'PODRenderer';

get '/' => sub {
  my $c = shift;
  $c->stash('hostname', Sys::Hostname::hostname());
  $c->render('index');
};

app->start;
__DATA__

@@ index.html.ep
% layout 'default';
% title 'Welcome';
Welcome to the Mojolicious real-time web framework! Hello, world! <%= $hostname %>

@@ layouts/default.html.ep
<!DOCTYPE html>
<html>
  <head><title><%= title %></title></head>
  <body><%= content %></body>
</html>

==> Procfile <==
web: 'perl -Mlib=$PWD/local/lib/perl5 ./local/bin/starman --preload-app --port $PORT'
Did I mention there is no documentation for running a perl app?
Flynn apps can (must?) be defined in a Heroku buildpack compatible manner.
The included flynn/slugbuilder component has some preset buildpacks, and
one of the buildpacks allows additional buildpacks (such as the perl one) to be
specified in a .buildpacks file. So that's what .buildpacks
is for, to pull in Miyagawa's buildpack for a Perl/PSGI application.
The cpanfile says what perl modules need to be installed. I used Mojolicious and generated a sample application with a very small amount of customisation.
For Miyagawa's buildpack, the perl script has to be named app.psgi (that's how it
detects if the buildpack should be used).
Finally the Procfile is a YAML file and it specifies how the command should be started
to run in 'web' (flynn scale web=5 scales the application to 5 concurrent instances).
I could have omitted the Procfile, and Flynn would have started the application
according to instructions in a .release file generated by the
buildpack.
That's how far I got before something broke and I couldn't get Flynn working again. Bear in mind, Flynn is still bleeding edge but it shows some promise.
Thoughts
- Flynn's still beta but the system shows promise. The company has a lot of sponsors and a good theoretical base ("service discovery inspired by the Google Omega paper").
- More documentation is needed, indeed the lack of explanation for running a perl app inspired this blog post.
- I was looking for something with a simple interface and Flynn was the first thing I tried. I just wanted to (a) be able to push my repo to have it deployed, and (b) not have to care where it's actually running. Flynn satisfied those two requirements.
- Flynn's error messages are painfully inadequate. "driver not supported" means the aufs kernel module couldn't be loaded. Other messages were even less useful.
- It's hard to debug applications running in containers (and by this I mean Flynn's own components) to find out what's going wrong
- Flynn writes heaps of logs under
/tmp/flynn-host-logsand, while they helped in debugging a little, I wonder if they'll ever be cleaned up. I couldn't run Flynn in production with such a profusion of log files growing forever. - Docker images seem a bit fragile. Running the
flynn-releasecommand broke because a docker image was partly downloaded and I had to clear it myself out of the/var/lib/dockerdirectory before Flynn could download the rest of its code.
Next up I'll be testing Tsuru.
2010-04-25 - No sound after upgrading to Ubuntu 9.10 (Karmic Koala)
This affected my EEE 901. The symptoms were:
- No sound output on the laptop's built-in device (snd-hda-intel)
- When I plugged in a USB sound device (snd-usb-audio), it also didn't produce any sound
- Pulseaudio showed only a "dummy" output device. No hardware devices shown
- "cat /proc/asound/cards" showed the sound cards were recognised by the kernel
The problem turned out to be with my $HOME/.asoundrc and $HOME/.asoundrc.asoundconf files. I found this:
- "alsamixer" failed to run, complaining of problems with the above files
Solution:
- I removed .asoundrc and .asoundrc.asoundconf
- I killed and restarted pulseaudio
- pulseaudio -k
- pulseaudio --start
Then sound worked. I assume that pulseaudio couldn't get the ALSA device information due to the problems with the config file(s). It was probably only .asoundrc.asoundconf with a problem but I had nothing special in the other file so I removed that too.
2010-04-16 - GPT, Grub and RAID
GPT is the Generalised Partition Table which is a new standard for partitioning a hard disk. Its advantages over the MSDOS partition table used since the 1980s are:
- larger devices (over 2T)
- more partitions per device
- extended set of partition types
Grub 2 (versions 1.96 and later) can boot disks which use GPT, but there are some considerations which are detailed below.
What's the MSDOS partition table?
The MSDOS partition table was invented when disk drive capacities were around 5-20 megabytes and sectors were addressed using a (C,H,S) 3-tuple: Cylinder, Head and Sector numbers. This addressing scheme has been obsolete for a very long time now, and has been kludged several times to cope. Firstly disk drive capacities increased enormously - and we started to use geometries with large numbers of heads (63) and sectors (255) to cope. Secondly disk drives no longer have a fixed geometry: although the number of heads is fixed (up to twice the number of physical platters the drive has), there is a varying number of sectors per track, as more data is stored on the outside of each platter. Disk drives store an approximately constant amount of data per square millimetre of disk surface. Thirdly, modern drives provide internal error correction by relocating sectors away from disk areas with physical defects.
The MSDOS partition table uses CHS and also provides an LBA representation of each partition. LBA is a linear numbering of sectors independent of the physical drive geometry in which sectors are numbered starting from zero and going to a very high number (depending on device listed capacity) and we have relied on this for some years now - as the size of devices exceeded the capacity of CHS to describe, operating systems started ignoring the CHS values and using only LBA. But LBA's capacity is about to run out; it has a hard limit of 2 TB (1 terabyte = 2^40 bytes) and we will soon surpass that capacity.
What's GPT?
GPT uses an LBA system with a much larger capacity. It has provision for more partitions per device (although in my experience, with larger device sizes we make larger partitions, not more partitions). MSDOS was limited to 4 so-called "primary" partitions and one of these could be used as a pointer to further "extended" partitions. It was a kludge, and GPT eliminates this kludge.
MSDOS also used a single byte to describe the contents of each partition. This was troublesome as almost all of the 256 possibilities have been used at various times (the linux fdisk utility contains a list). So GPT extends that with UUID based partition types - an almost limitless set.
Linux supports GPT partition tables (also called disk labels). A tool called 'gdisk' can create and edit them, and other partitioning tools have varying levels of support.
Grub 2 can boot disks partitioned with GPT. But there are some interactions between Grub, GPT and RAID, which is the reason for the existence of this article.
GPT, Grub2 and RAID considerations
GPT partitions can be made with 'gdisk'. Some of the tools are still immature.
Grub2 can boot GPT partitioned disks, but it needs a so-called "BIOS Boot Partition" of at least 32 Mbytes. That's where Grub2 stores some of its low level boot code.
Grub2 cannot boot off a RAID partition which uses version 1.0, 1.1 or 1.2 metadata. The RAID must have been created using version 0.90 metadata.
4K sector disks
Storage manufacturers are now shipping 4K sector disks. Why 4K not the previous standard of 512 bytes? 4K sectors are more efficient for such large devices: the drive can pick up more data with each read operation; the number of physical sectors on the device is reduced by 8 times (which reduces the size of relocation tables, for instance); 4K matches the page size used in the x86 architecture. There are a lot of good reasons why.
The first Western Digital 4K drives were released with a compatibility mode enabled in which the drive simulates 512 byte sectors. This can affect performance quite a lot. The installer should ensure that all partitions are a multiple of 8 sectors in size. This affects GPT partitioning as well as MSDOS. It's a bit easier to ensure this in GPT because there's no geometry baggage, unlike MSDOS.
The LS-30 can notify an alert via its internal PSTN interface. There is also an optional GSM interface (pictured), which takes a SIM card and can be used instead of or in addition to the PSTN notification.

Alerts are notified via SMS message at first, and this is followed by a voice call. Five numbers can be configured for GSM. The SMS message looks like this:
Burglar 01-03 19:19 2010/04/02
The "01-03" refers to the device which triggered.
My monitoring software can detect a Burglary message and SMS me directly. I get the impression that it takes a couple of minutes for the LS-30 to get around to sending an SMS. It may be that the LS-30 takes time to check the PSTN line for a dial tone. The LS-30 seems to try to alert via PSTN first, and tries GSM second.
My monitoring system sends an SMS of this form:
Burglary at Fri Apr 9 10:48:50 EST 2010 zone 500 group 00
The zone and group numbers would correspond (on a real burglary) to the "01-03" shown above.
In February 2010, after long investigation, I purchased an LS-30 Alarm System From Securepro Security. Having moved recently, I needed an alarm system. I'd had many years experience with the Solution 16 (PDF) range of alarms, originally designed and manufactured by EDM (a Zeta Internet customer) and now owned by Bosch. But I thought perhaps technology has improved in the meantime, and I wanted something more powerful, configurable, ... more geeky. That's the LS-30.

The LS-30 is an alarm system designed for self-installation in a home or business. It communicates wirelessly with its devices, which include:
- PIR (Passive Infra-Red) burglar sensors
- Remote control key fobs
- Solar powered outdoors siren
- Magnetic reed switch door sensors
- Smoke detectors
- And more.
It is very configurable, and according to the vendor has "more features than any other system available". Except perhaps for very expensive commercial systems. What appealed to me though, was the ethernet interface - I can plug it into my network and (hopefully) configure it remotely.
I have begun to reverse-engineer the LS-30 communications protocol. Furthermore, I have released my code under the GNU General Public License (Version 3) so others in the community can benefit from this effort (and help me finish the job). See the links in the left column to my GitHub project.
I was able to solve the problem with dnscache. Basically, before sending each new request to a nameserver (for a particular query), dnscache would close the socket used for the last request. So any late response would not reach dnscache.
The code flow was roughly this:
+->  close socket
|    open socket()
|    bind() local end of socket to random port
|    connect() socket to next destination
|    send() request packet
+-<  poll with timeout for a response
The fix turned out to be fairly simple. Open a socket before sending the first request packet for a particular query, do not connect it to the destination, and use sendto() to specify each destination instead of send(). So the fixed code flow now looks like this:
     open socket()
     bind() local end of socket to random port
+->  sendto() request packet to next destination
|
+-<  poll with timeout for a response
     close() socket
The improvement on performance is extreme. I'm testing on a virtual machine using the 'netem' module to artificially create network latency of 5000ms. Before patching, dnscache took 310 seconds to lookup 'A www.telstra.net' - much longer than I had calculated in the previous post, because in fact dnscache had to send more requests than expected due to missing nameserver glue, perhaps for the net domain. After patching, dnscache was able to resolve 'www.telstra.net' in only 16 seconds. It sends 6 queries then receives the response to the first, and closes the socket so subsequent responses are ignored (they're not needed anyway).
You might think this patch is not necessary because 5000ms network latency is an extreme test and most internet hosts will have much lower latency (it's usually a leaf-node problem) but I experienced it on a modern HSDPA network. Also I have seen saturated dialup and ISDN connections with very high latencies (over 3000ms for ISDN). Also dnscache's timeouts start at 1 second so performance will start to degrade as soon as average request latency exceeds 1000ms. The more nameservers a domain has, the longer it will take to lookup because dnscache sends a request to every nameserver with a 1-second timeout before changing to 3 seconds (then 11, then 45).
I've made the patch available on github.com in a new repository I made called djbdns. The url is:
http://github.com/nickandrew/djbdns/tree/high-latency-patch
This repository also contains all public releases of djbdns to date: version 1.01 through 1.05. DJB has put djbdns into the public domain so it is OK for me to do this. There are also some patches written by other people, linked from tinydns.org. Feel free to clone, fork and submit further patches to this djbdns repository on github.
Like most people I use dnscache extensively for name resolution within my network. All this worked fine until recently when my DSL link broke (with the telephone line) and I had to use HSDPA for external connectivity.
My HSDPA provider is supposed to provide a maximum speed of at least 1.8 Mbit/sec - of course this can be lower due to network congestion, poor signal strength, low capacity network links and so on. I don't think I have ever received the full 1800 kbit/sec from my provider, maybe nothing over 300 kbit/sec in fact.
Anyway this particular outage was particularly troublesome because I was getting only 50 kbit/sec through HSDPA ... slower than a dialup modem. It was slow in another respect too, the packet round-trip time was between 5 and 7 seconds. That's over 200 times more than a typical RTT on DSL of 25 ms.
I don't know what caused the extremely high latency, but I do know what its effect was. Dnscache failed almost completely. It would send out requests to nameservers on the internet, and not receiving any response in a reasonable time, would go on to try the next nameserver, and the next, and so on. The responses came back at some later time ... after dnscache had given up on the request (and dnscache would ignore the response). So the net effect was a storm of DNS packets sent and received, as well as ICMP port-unreachable packets when responses were received after dnscache had stopped listening.
Now that the DSL is working I am testing dnscache (from djbdns 1.05) to see the exact nature of this problem and if it can be fixed. I am using Linux's Traffic Control subsystem (see lartc.org for documentation) and specifically the 'netem' queue discipline module to simulate various amounts of latency to a virtual host.
I setup the variable latency using this script:
#!/bin/bash
#
#  Setup network delay for testing dnscache on high latency links
#  Outbound traffic on eth0 is delayed by several seconds if
#    - ip dst is 192.168.1.75

set -x

tc qdisc del dev eth0 root 2>/dev/null

# Setup root class and base rates
tc qdisc add dev eth0 root handle 1: htb default 99

tc class add dev eth0 parent 1: classid 1:1 htb rate 100mbit
# all traffic
tc class add dev eth0 parent 1:1 classid 1:10 htb rate 100mbit
# delayed traffic
tc class add dev eth0 parent 1:1 classid 1:11 htb rate 2mbit
# default
tc class add dev eth0 parent 1:1 classid 1:99 htb rate 3500kbit

tc qdisc add dev eth0 parent 1:10 handle 10: sfq
tc qdisc add dev eth0 parent 1:11 handle 11: netem delay 5000ms
tc qdisc add dev eth0 parent 1:99 handle 99: sfq

# Move selected traffic into 1:11
tc filter add dev eth0 parent 1: protocol ip prio 1 u32 match ip dst 192.168.1.75 flowid 1:11
This script is run on my gateway and it uses the HTB queue discipline on device eth0 and some classes beneath that to filter outbound packets on that interface. Packets sent to 192.168.1.75 are delayed (by the 'netem' qdisc) by exactly 5000 msec, which is more than enough time to give dnscache a headache.
Next up I hacked dnscache to (a) run as an ordinary user, (b) listen on port 5300, and (c) show me what it is doing. Dnscache implements exponential timeouts on sent requests for 1, 3, 11 and 45 seconds. I don't know why djb chose those particular numbers. I started the server and sent a single request to lookup an 'A' record for telstra.net:
dig -p 5300 @127.0.0.1 A telstra.net +tries=1
This is what dnscache output at first:
$ ./dnscache
starting
query 1 7f000001:e4d2:6114 1 telstra.net.
tx 0 1 telstra.net. . 803f0235 c03a801e c0249411 c6290004 c707532a 80080a5a c0702404 c0cbe60a ca0c1b21 c0e44fc9 c00505f1 c021040c c1000e81
dns_transmit to 128.63.2.53, timeout set to 1
dns_transmit to 192.58.128.30, timeout set to 1
dns_transmit to 192.36.148.17, timeout set to 1
dns_transmit to 198.41.0.4, timeout set to 1
dns_transmit to 199.7.83.42, timeout set to 1
dns_transmit to 128.8.10.90, timeout set to 1
dns_transmit to 192.112.36.4, timeout set to 1
dns_transmit to 192.203.230.10, timeout set to 1
dns_transmit to 202.12.27.33, timeout set to 1
dns_transmit to 192.228.79.201, timeout set to 1
dns_transmit to 192.5.5.241, timeout set to 1
dns_transmit to 192.33.4.12, timeout set to 1
dns_transmit to 193.0.14.129, timeout set to 1
What seems to be happening here is that dnscache is looking up the root nameservers ('.') for 'telstra.net'. The hex numbers are the IPv4 addresses of each root nameserver. Dnscache tries them in order (at least, in the same order as they appear on the 'tx' line). There are 13 root nameservers and these requests appear to be issued once per second - so this process has taken 13 seconds so far. With a 5000 msec delay on the interface, 8 of those 13 requests have been replied-to, but dnscache apparently stops listening for a response as soon as its timeout expires (1 second here) and it sends the next request.
Continuing on:
dns_transmit to 128.63.2.53, timeout set to 3
dns_transmit to 192.58.128.30, timeout set to 3
dns_transmit to 192.36.148.17, timeout set to 3
dns_transmit to 198.41.0.4, timeout set to 3
dns_transmit to 199.7.83.42, timeout set to 3
dns_transmit to 128.8.10.90, timeout set to 3
dns_transmit to 192.112.36.4, timeout set to 3
dns_transmit to 192.203.230.10, timeout set to 3
dns_transmit to 202.12.27.33, timeout set to 3
dns_transmit to 192.228.79.201, timeout set to 3
dns_transmit to 192.5.5.241, timeout set to 3
dns_transmit to 192.33.4.12, timeout set to 3
dns_transmit to 193.0.14.129, timeout set to 3
Dnscache sends to the same set of 13 nameservers, but with a 3 second timeout on each. That takes 39 seconds (for a total time spent so far of 52 seconds, and we still don't know what are the nameservers for telstra.net). Continuing:
dns_transmit to 128.63.2.53, timeout set to 11
rr 803f0235 172800 1 a.gtld-servers.net. c005061e
rr 803f0235 172800 1 b.gtld-servers.net. c0210e1e
rr 803f0235 172800 1 c.gtld-servers.net. c01a5c1e
rr 803f0235 172800 1 d.gtld-servers.net. c01f501e
rr 803f0235 172800 1 e.gtld-servers.net. c00c5e1e
rr 803f0235 172800 1 f.gtld-servers.net. c023331e
rr 803f0235 172800 1 g.gtld-servers.net. c02a5d1e
rr 803f0235 172800 1 h.gtld-servers.net. c036701e
rr 803f0235 172800 1 i.gtld-servers.net. c02bac1e
rr 803f0235 172800 1 j.gtld-servers.net. c0304f1e
rr 803f0235 172800 1 k.gtld-servers.net. c034b21e
rr 803f0235 172800 1 l.gtld-servers.net. c029a21e
rr 803f0235 172800 1 m.gtld-servers.net. c037531e
rr 803f0235 172800 ns net. a.gtld-servers.net.
rr 803f0235 172800 ns net. b.gtld-servers.net.
rr 803f0235 172800 ns net. c.gtld-servers.net.
rr 803f0235 172800 ns net. d.gtld-servers.net.
rr 803f0235 172800 ns net. e.gtld-servers.net.
rr 803f0235 172800 ns net. f.gtld-servers.net.
rr 803f0235 172800 ns net. g.gtld-servers.net.
rr 803f0235 172800 ns net. h.gtld-servers.net.
rr 803f0235 172800 ns net. i.gtld-servers.net.
rr 803f0235 172800 ns net. j.gtld-servers.net.
rr 803f0235 172800 ns net. k.gtld-servers.net.
rr 803f0235 172800 ns net. l.gtld-servers.net.
rr 803f0235 172800 ns net. m.gtld-servers.net.
rr 803f0235 172800 28 a.gtld-servers.net. 20010503a83e00000000000000020030
stats 1 945 1 0
cached 1 a.gtld-servers.net.
cached 1 b.gtld-servers.net.
cached 1 c.gtld-servers.net.
cached 1 d.gtld-servers.net.
cached 1 e.gtld-servers.net.
cached 1 f.gtld-servers.net.
cached 1 g.gtld-servers.net.
cached 1 h.gtld-servers.net.
cached 1 i.gtld-servers.net.
cached 1 j.gtld-servers.net.
cached 1 k.gtld-servers.net.
cached 1 l.gtld-servers.net.
cached 1 m.gtld-servers.net.
Dnscache has finally increased its timeout to 11 and after another 5 seconds (total time elapsed now 57 seconds) it receives a response. Now it knows the nameservers for the 'net' top-level domain. There are 13 of them and so it's going to take another 57 seconds before it learns the 4 nameservers for 'telstra.net', and then another 21 seconds to learn that there is actually no 'A' record for 'telstra.net'. That's 135 seconds total time. I don't know how long clients typically wait for a response but it's a lot less than that.
Clearly dnscache should implement two timeouts per request: one for sending a second request (to another nameserver) for the same information, and one to give up waiting for a response from the first request. The 2nd timeout should be much longer than the first.
If dnscache was modified to wait up to 10 seconds for a response but try each successive nameserver after 1 second, then it should be possible for dnscache to answer the query within 15 seconds, which is reasonable in this context. In these calculations I'm assuming that dnscache has no existing cache (other than the list of root nameservers) because that makes dnscache's behaviour predictable, and it shows us the worst case performance.
The next step for me is to work out if dnscache can have multiple outstanding requests to nameservers for the same client request. Obviously dnscache can handle multiple concurrent client requests and must query many different nameservers concurrently, but the question is whether it can query multiple nameservers for the same information, at more or less the same time, and use the first response that is received.